Create a Podcast Site
by Željko Filipin
Introduction
For more than a year I had a half finished blog post on how to create a podcast site. I never had the time to finish and publish it. Recently I had to create a podcast site and now is the chance to finish it. If I do not do it now, I probably never will.
I have already blogged on podcasts and podcasting and I just mentioned creating a site. Now I want to get into detail.
Hosting
You can host the podcast at blogger.com or wordpress.com but I would recommend a cheap shared hosting. It gives you way more flexibility. You can host wordpress.org based site on almost any cheap shared hosting.
Domain
Pick a domain. Make it short and relevant to the topic of the podcast. Please do not use www in front of the domain. Also, dashes in domain name are so 2009. I would recommend com domains. For example, a good name for a podcast on Watir is Watir Podcast. It is trivial to create a domain from such name: watirpodcast.com. Both the name of the site and the name of the domain make it clear what is the topic of the podcast.
If you already have a domain (you probably already have a blog) create a subdomain. For example, you have a blog at filipin.eu. The podcast could live at podcast.filipin.eu.
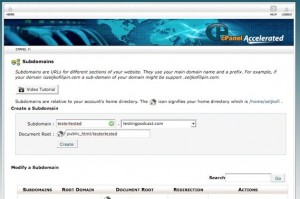
The site I am currently working on is a bit more complicated. Fellow tester, blogger and podcaster Pradeep Soundararajan asked if I could help him with the podcast site. He has a blog at testertested.blogspot.com and I have testingpodcast.com domain (the site is still under construction, but feel free to take a look), and we settled down for testertested.testingpodcast.com.
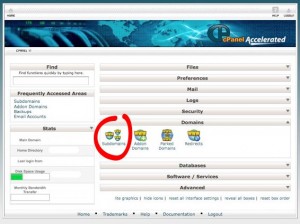
To create a subdomain, log in to cPanel (or whatever software you get with hosting) and create a subdomain. If you have cPanel, go to Domains > Subdomains and create it.
Install WordPress
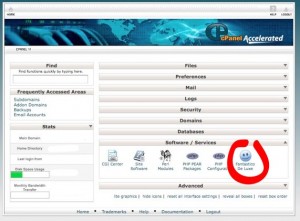
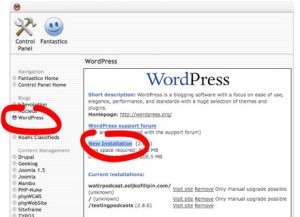
cPanel has Fantastico script that makes installing WordPress trivial. Go to Software/Services > Fantastico De Luxe > Blogs > WordPress > New Installation and finish the wizard.
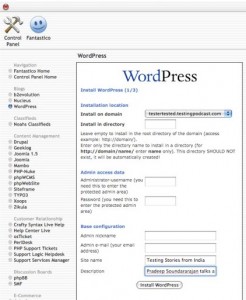
Go to testertested.testingpodcast.com and the site is there!
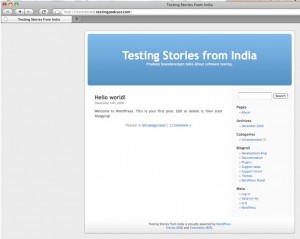
Theme
The site is up, but there is still some work to be done. Please, change the theme. Log in and go to Appearance > Add New Themes.
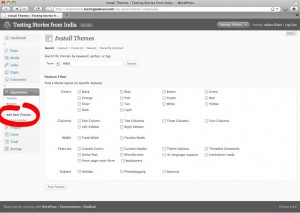
There is so much themes that you will probably spend some time looking for one that you like. I selected Atahualpa from featured themes. When you find the theme you like, you can preview it with Preview and install with Install. After you have installed it, activate it with Activate. Go to the site by clicking Visit Site link at the top of the page. (I usually have administration page in one tab and the site in another tab.)
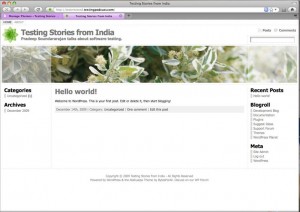
Much better.
You can configure the theme at Appearance > Atahualpa Theme Options. I do not have any design talent, so I tend not to mess with the theme.
Configure WordPress
There are a few tweaks to WordPress that you should do.
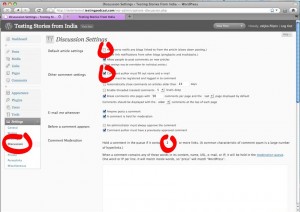
At Settings > Discussion I usually check Attempt to notify any blogs linked to from the article (slows down posting.) and uncheck Comment author must fill out name and e-mail and I change Comment Moderation to hold a comment in the queue if it contains 1 or more links (the default is 2).
At Settings > Privacy I change the setting to I would like my blog to be visible to everyone, including search engines (like Google, Sphere, Technorati) and archivers.
At Settings > Permalinks I set Common settings > Custom Structure to /%postname%/.
At Settings > Miscellaneous I uncheck Organize my uploads into month- and year-based folders.
Plugins
There a few plugins that you just have to have.
Go to Plugins > Installed and activate Akismet. After it is activated you have to enter your WordPress.com API Key at Plugins > Askimet Configuration. You will need wordpress.com account. Create one if you do not already have it. Go to wordpress.com/profile to get your API Key.
podPress is must have plugin for podcasters. To install it go to Plugins > Add New and search for podPress. It should be the first one in search results. As with themes, there is Install link. After the installation, activate it with Activate Plugin link.
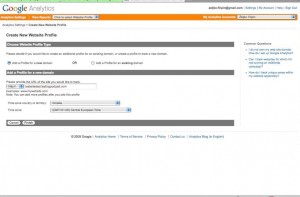
Since I am fanatic about knowing all possible statistics, I always install my favorite data gathering plugins. Since you already know how to install and activate plugins, do that for Google Analytics for WordPress. You will need Google Analytics account. Log in and click Add Website Profile» link. Get Web Property ID and paste it to Plugins > Installed > Google Analytics for WordPress > Settings > Analytics Account ID.
FeedBurner FeedSmith is a bit different to install because it is not in WordPress repository. Go to Creating your WordPress feed (self-hosted WordPress) and download FeedBurner FeedSmith plugin. Go to Plugins > Add New > Upload, upload downloaded zip file, and activate it after the installation. I received The plugin does not have a valid header error message after the activation, so I unzipped it and uploaded FeedBurner_FeedSmith_Plugin.php to /public_html/testertested/wp-content/plugins with FTP client. Acitivate it at Plugins > Installed.
You will need FeedBurner account. Log in, and paste http://testertested.testingpodcast.com/ in text box under Type your blog or feed address here. Make sure I am a podcaster! checkbox is checked. Click button Next>> and finish the wizard.
Go to Settings > FeedBurner and enter http://feeds.feedburner.com/TestingStoriesFromIndia in text box under http://feeds.feedburner.com/yourfeed.
I think we are done with plugins for now.
Podtrac
You will need a good statistics on podcast downloads. Create Podtrac account (click Podcasters). Log in, click link Register a New Podcast >>> and finish the wizard.
Links
Everything is set up, but there is no content. Delete all default links at Links > Edit. Add link to your blog or site.
Pages
You probably need only one page: About. Add your image and short description of the site there.
Users
Create new users at Users > Add New if you are not the only one editing the site.
Posts
Rename the default Uncategorized category to Podcast at Posts > Categories. Make sure you change both Category Name and Category Slug settings.
Delete the default post at Posts > Edit and add new at Posts > Add New. Enter title and short description of the podcast. Add [display_podcast] where you want the link to the mp3 file to appear. Check Podcast checkbox in Categories.
Make sure to add your small image. I think it is very important. It makes the site more human. While uploading make sure to enter your name in Title, Caption and Description.

Click Add Media File button at the bottom of the page. Paste URL of the podcast prefixed with http://www.podtrac.com/pts/redirect.mp3/ in Location text box. In my example it was http://www.podtrac.com/pts/redirect.mp3/www.skilledtests.com/testertested/FIET.mp3. Enter FIET.mp3 as file title and click Auto Detect buttons next to Size and Duration text boxes.
Click button Publish.
iTunes
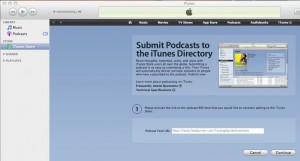
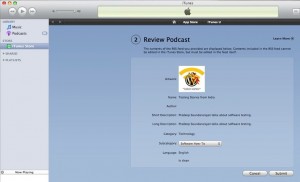
You should submit the podcast to a directory. I would highly recommend to at least submit podcast to the iTunes Store. Requires iTunes application to be installed and launched. Also requires logging in to iTunes Store.
podPress
A few final tweaks to podPress.
Go to podPress > Feed/iTunes Settings and enter iTunes:FeedID. It is a number from the end of the podcast iTunes link. You got the link in e-mail from Apple after the podcast is added to iTunes Store. The link looks like http://itunes.apple.com/WebObjects/MZStore.woa/wa/viewPodcast?id=346653690 and FeedID is 346653690 in this case.
Enter podcast title, description and feed at the same page. Also, add an image as album art.
Go to podPress > General Settings and select Enable PodTrac Statistics.
The End
I think it is all for now. Feel free to comment. Please let me know if I missed something that should be done, or if I am doing something wrong.
tags: podcast